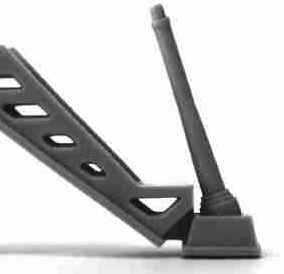
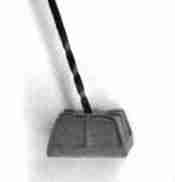
This is how the landing gear looks before
modification |
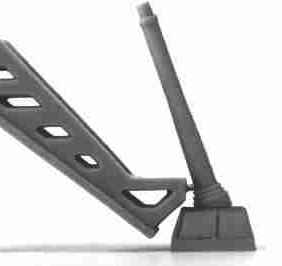
This is how the landing gear looks after the
modification |
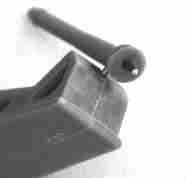
1
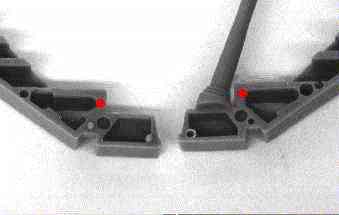
As indicated by the red
dots, fill the two holes that are cast into the existing
piece with a thick gap-filling superglue. This will
strengthen the area behind the front of the first step
to support the pin you will be inserting. |
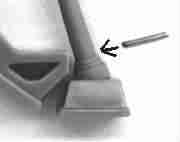
2
Glue the landing gear together. Then
drill a 1/16" hole through the support strut right above
the "rubber boot part" and into the front of the bottom
step. |
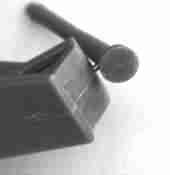
3
Cut a piece of wire approx. 3/8" long
then super glue it into place |
4
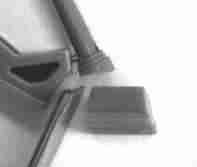
Now carefully cut off the original landing
pad with a razor saw or a dremel tool. |
5
Clean up the bottom with files and sandpaper
etc. |
6
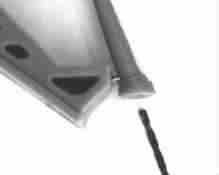
Carefully drill up into the bottom of
the strut. |
7
Drill into the indent on the top of the
new pad. |
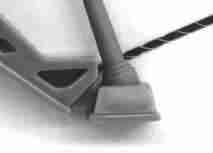
8
Cut a small piece of wire and super-glue
into place. |
9
WAIT
DO NOT ATTACH NEW PADS UNTIL
you have completed steps 1-8 for all three sets of landing
legs.
Glue the landing legs to the bottom of the hull. Now
with a five minute epoxy glue the new pads onto all
three of the landing legs and carefully turn the ship
over so it is sitting on the new pads. Now you can can
make any final adjustments before the epoxy has cured.
|